Here is how you change the SD card.
Remove the power cable and dongle/s (to prevent them being damaged)
Remove the two screws either side of the cover i.e. four in total (these are larger than the other screws so keep them separate) and the four screws along the back edge of the cover.
Slide the cover towards the rear of the unit and remove completely.
The following photo shows the general layout inside the B3 and the SD Card position is ringed in red.
To reduce the risk of static damage try not to touch any components on any of the circuit boards as far as possible.
Refer to the photos below - push the edge of the card, in the direction of the arrow, against the spring pressure and release. It will move a short way out.
Mark the Raspberry Pi circuit board either side of the card to make it easier to locate the new one and then pull the card completely out, making a note of the orientation - the gold contacts are facing upwards and go towards the circuit board.
Position the new card using the marks as a guide (gold contacts uppermost and towards the Raspberry Pi board) and locate into the card socket. Push the card against the spring and release. The card should stay in place.
The SD Card holder is on the underside of the Raspberry Pi circuit board – see photo – which is rotated in this view
Plug the power lead in and switch the B3 on. Check it boots up OK - it should display ‘brennan’ in black on white, briefly, then ‘brennan’ in white on black and then ‘480Gb’ or ‘2000Gb’ (depending on the model).
Press and hold the Play/Stop button until 'OK to turn off' is displayed, release the button, wait for ‘480Gb’ or ‘2000Gb’ to be displayed again and then switch off.
Remove the power lead and replace the cover and screws.
Plug in the WiFi dongle (marked 802.11n) and the Bluetooth one (V5.0 or CSR4.0), if required, power the B3 on and let it boot up. Make sure it displays an IP Address and the clock – to indicate it has reconnected to WiFi and the internet.
After fitting the new card we recommend doing a software update. Use the front control knob to go to Main menu > Settings & Tools > Maintenance > 'Web Upgrade'.
Please note that any USB storage device must be FAT32 formatted to work with the B3 – see the Formatting section later in the document.
The music you want to transfer to the B3 must be in one of the following digital formats
The B3 will not play -
*You can import OGG and Opus files but the B3 will not recognise them. However if you change the extension from .ogg or .opus to .mp3, for example, and run Scan Disk the B3 will find and play them.
So a typical music file (Track) will look like this -
You can transfer and store a mix of formats on the B3 which will play across them seamlessly.
This is how music is stored in the B3 -
Where "Music", "Artist1", "Album1" etc. are folders on the hard drive.
So the music to be imported should be arranged by Artist then Album then Tracks, in order to import, display and play as expected on the B3 (also applies to the web UI and apps).
Artist – a folder e.g. "The Beatles"
Album – a folder e.g. "Abbey Road"
01 Track – a file e.g. "01 Here Comes The Sun.flac"
02 Track – a file e.g. "02 Something.flac"
etc.
Numbering the Tracks keeps them in the correct playing order – otherwise the B3 will arrange and play them in alphabetical order.
Use 01, 02, 03 …….. 9, 10, 11, etc to prevent 10 getting put between 1 and 2.
You can have multiple Albums within an Artist folder -
The Beatles
Abbey Road
01 Come Together.flac
02 Something.flac
etc
Rubber Soul
01 Drive My Car.flac
02 Norwegian Wood.flac
etc
If you want to import multiple Artists-Albums-Tracks, add a ‘music’ folder at the top level.
Music
The Beatles
Abbey Road
01 Come Together.flac
etc
Fleetwood Mac
Rumours
01 Second Hand News.mp3
etc
Notes
Copying the music to the B3:
Make sure the B3 is powered off, plug the USB device into USB A (on the front of the B3) and switch the power on.
If using a memory stick (thumb drive) there is no need to power the B3 off before inserting.
After booting up fully, a USB icon will appear on the B3’s display – this indicates the B3 has recognised the USB device, meaning that it must have been FAT32 formatted – so all good.
Click (press briefly and release) the control knob to open the Main menu. Scroll down to ‘USB Functions’ and click to open.
The ‘USB Functions’ option will only be visible when a FAT32 formatted USB device is plugged in.
‘Browse USB A’ is the first option, click to select..
In the example the USB device has one Artist listed - Alan Parsons Project.
Ignore the ‘System Volume Information’ folder – that’s only used by Microsoft Windows.
With ‘Alan Parsons Project’ highlighted, you have the following options -
Pressing and holding the Back button at any level will exit the menus completely.
If you have a ‘music’ folder, containing multiple Artists-Albums-Tracks, you can import everything in the ‘music’ folder by highlighting it and pressing the Next button. Or push the knob to drill down through the Artist and Album folders.
Long titles – a warning:
Any Artist, Album or Track name, including any spaces, should not exceed 175 characters, including the extension. So for Track names this would be -
a name consisting 170 characters.flac
a name consisting 171 characters.mp3
etc.
Names exceeding this limit can give unpredictable results such as an Artist, Album and/or Tracks not being displayed.
b2db
The B3 generates a database (index) of the music on the hard drive, called ‘b2db’, which it uses to locate and play your music.
‘b2db’ is a text file (see the Katie Melua example below) that can be exported – Maintenance menu > ‘Save b2db to USB A’ - viewed and edited using a text editor such as Notepad++ or imported into a spreadsheet. Also useful if you want a print-out of your music.
Katie Melua/In Winter
10 tracks
01 The Little Swallow.flac
02 River.flac
03 Perfect World.flac
04 Cradle Song.flac
05 A Time To Buy.flac
06 Plane Song.flac
07 If You Are So Beautiful.flac
08 Dreams On Fire.flac
09 All-Night Vigil - Nunc Dimittis.flac
10 O Holy Night.flac
‘Scan Disk’ – Maintenance menu – rebuilds the ‘b2db’ file and should be run after doing any editing such as renaming or deleting.
Formatting the USB device:
Memory sticks (thumb drives), 512GB and below, are usually FAT32 formatted and will work ‘out of the box’. HDDs and SSDs will normally need to be FAT32 formatted before they can work with the B3. This can be done by the B3.
Please note that formatting a USB storage device will erase all data stored on it, so make sure you do not want anything it contains before formatting.
With the B3 powered off, plug the USB storage device into USB A and switch the B3 on. Click the control knob to open the Main menu > go to Settings & Tools > Maintenance > Advanced > ‘Format USB A’.
Make sure you select ‘Format USB A’ not ‘Format HDD’ – the latter will erase all of your music – if unsure, press the Back button to go back one step and check what you have selected.
‘Unmounting’ and ‘Partitioning’ are displayed briefly and then ‘Formatting’, which will stay on screen for a while, depending on the memory capacity of the drive. The display shows the clock when completed.
Before unplugging any USB storage device, press and hold the Play/Stop button until ‘OK to turn off’ is shown, release the button, wait for the clock to be displayed again and then switch off.
When you plug the drive into your computer you may see a warning message. If you have followed the safe to remove procedure described above, you can ignore this and continue without fixing or scanning.
The largest capacity USB storage device that can be FAT32 formatted and work with the B3 is 2TB.
Partitioning:
If you are having problems ‘formatting’ a particular HDD or SSD or the formatting appears to have worked but the B3 still doesn’t recognise the drive, it may be due to the ‘Partitioning’ type – the way the memory space on the drive is divided up.
The B3 will only work with MBR (Master Boot Record) partitioned drives and some newer HDDs and SSDs are supplied with GPT (GUID Partition Table). You can check the drive for GPT or MBR by plugging it into your computer (Windows version)
Select File Explorer > ‘This PC’ > right click on the drive name > Properties > Hardware > select the drive from the list > Properties > Volumes > Populate.
You can convert a GPT partitioned drive to MBR, see this article from EaseUS – MBR vs GPT – What’s the difference
Then tap on the group icon for the Sonos speaker you want to be the master. I picked “Living Room Stereo”.
Then add zones by checking the box next to the additional zone names and click done. I added Office to Living Room Stereo.
Now everything played to Living Room Stereo will play to both zones.
3.Strip away the insulation on the wire with pliers or wire strippers. Make sure the end of the wire is now exposed.
4.Repeat for the other wire
5.Twist the copper wire strands at the end of each wire
6.Put the plastic case on the wires. Red wire in Red case and black wire in black case
7.Loosen the screws on the Banana plug
8.Push the wire into the plugs as far as possible
9.Tighten the screws on the plugs to secure them
10.Push the plastic case onto the plugs
11. On the other end of the wire, Strip away 2cm of the insulation from the end.
12. Now the wire is ready to be plugged into the Brennan and the speaker.
13. To plug into the Brennan BSP50 speaker you have to press the button down on the back of speaker and insert red wire in red cap and black wire in the black cap
When Brennan owners first asked for this we thought it was impossible but after exploring many dead ends Martin had a brainwave and invented a new way of “streaming” CDs.
Now you just pick the zone, insert a CD and press Play. (A zone is a group of Sonos speakers and could be the entire house).
And the good news is the CD is not compressed - you get to listen to exactly what’s on the disk.
The Brennan is the only device in the world that can do this. (Though to be fair you could buy a Sonos Port at $449 and connect a CD player to it).
The CD can only play to one zone at once so if you do start to play on a second zone it will switch off the first.
News - February 2022
B2 can now play CDs directly to Sonos speakers. More here.
]]>
Then click on the Wrench Icon to open the Debug Window
If your Brennan is behaving erratically you can sometimes see error messages in the Debug window..
Sometime we ask owners with problems to
In the above I clicked Forget and Scan Sonos - to check that B2 could find the Sonos speakers on the network.
]]>In addition to the main store of flac music files, the B2 has the capability to store and maintain a parallel hidden set of those flac files in mp3 format. These hidden mp3 files are called Mirror files. The B2 has an ‘Export MP3’ function that is then used to copy selected (or all) of the mp3 Mirror files to a USB device and these can then be played on other mp3 devices.
Many portable music players and car systems either do not play flac files or have limited memory space in which to store the music. The B2 ‘Export MP3’ function is a very effective way of enabling your music files to be quickly downloaded to a USB device or mp3 player to be played while on the move.
Mp3 files provide good quality sound in a much compressed file; for example a raw CD 4 minute track (wav format) requires about 35MBytes of storage, when this is compressed to flac the storage is reduced to about 20MBytes, and when it is compressed to mp3 format the storage is further reduced to approximately 4 Mbytes.
So where memory storage is at a premium, the mp3 files have a major advantage. The transfer rate for these files to USB is also much faster because of the much smaller sizes of the mp3 files.
The B2 is set to use ‘flac’ compression by default. The alternative ‘Flac+mp3’ compression option generates both ‘flac’ and ‘mp3’ files automatically while the B2 is in 'Standby' mode and is compressing the ripped 'wav' files. It works by creating a sub-folder named ‘.mirror’ in each ‘flac’ album folder. These ‘.mirror’ folders contain the ‘mp3’ track versions in each of the parent ‘flac’ album folder and is hidden from the main B2 functions, so that they are not displayed in the artist, album or track listings that you see in normal usage.
When the ‘flac+mp3’ process has completed, you can use the ‘Export MP3’ function, located in the ‘Playlist Menu’ which copies the ‘mp3’ versions of the artists, albums or tracks that are present in that playlist to a USB device.
Alternatively, if you already have a ‘.flac’ based collection, you can set the B2 to generate ‘.mirror’ files from your existing collection.
Pre-preparation of the B2
The compression process works while the B2 is in ‘Standby’ mode, that is when the B2 is powered up but is not ripping CDs or playing music or being accessed through the WebUI. In order to preserve the front panel display screen lifespan, it is recommended that the Screensaver option is set as shown here.
1. Go to front panel Settings > Maintenance > Screensaver
2. Rotate the knob and select '16'
This setting will cause the front panel display to auto-blank after 5 minutes of no activity. When compression is running, this will be seen as a rapidly flashing red indicator on the front panel.
For most music collections the two main scenarios are:
1. You have an existing ‘.flac’ collection (and may have a mix of ‘.mp3’ albums and tracks which is fine). To create the ‘.mirror’ files follow the steps shown here.
(a) From the front panel control go to, Main > Settings > Compression
(b) Select the 'Flac+mp3' option.
(c) Select Settings > Compress Now
The B2 will produce the ‘.mirror’ mp3 files while it is in standby mode. If you start to play music then the B2 will stop the compression while the music is being played. When you stop playing the music then the B2 will resume compression automatically after being idle for 5 minutes.
or
2. You have purchased a new B2 and are ripping CDs into a new collection.
(a) From the front panel control select Settings > Compression
(b) Select the 'Flac+mp3' option.
(c) Go back to the main menu.
(d) Insert the first CD and begin the ripping process.
(e) When the CD is ejected (normally in about 5 – 6 minutes), insert the second CD.
(f) Repeat step (e) up to a maximum of 10 CDs total
(g) Leave the B2 powered up; it will begin compressing after 5 minutes of no other activity (such as playing music or having the browser WebUI open)
(h) Each CD will take about 1 hour to process to completion, so we advise that these are run in batches of 10 CDs every 12 hours or so. This enables the B2 to complete each batch of ripped CDs before you begin to rip the next batch.
The ‘flac+mp3’ option is slow in operation, but once it is complete it is a very quick and convenient method of creating portable music.
How to use the Export MP3 function to copy MP3 files to USB
(a) Plug a USB device into the B2's USB C port.
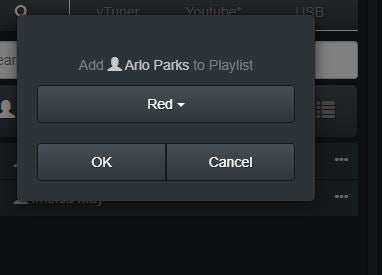
(b) Select or create a playlist to be used (e.g. Red playlist in the example here).
(c) From the WebUI, select the artists or albums or tracks, by clicking on the ‘three dots’ icon on right side of the window as shown below.
(d) Click on ‘Add to Playlist’ as shown below.
(e) Select the playlist that you have assigned in step (b), in this case the Red playlist.
(f) Repeat steps (c), (d) and (e) until you have selected all the required artists, albums and tracks.
(g) From the front panel knob, go to Main > Playlist Menu > Export MP3s and click on this.
(h) An incrementing count will be displayed in the lower left front panel display, this is the Export MP3 function copying the .mp3 music to the USB device.
(I) When the counter has complete, remove the USB device from the B2.
The USB device is now ready to be used in a mp3 player.
Additional Information Notes
1. During the period that the Mirror files are initially being created you can use the 'Export MP3' function to create USB mp3 playlists. If the B2 has not yet created a particular Mirror folder, the B2 just moves on to the next playlist item.
2. The ‘Export’ function does NOT save the ‘mirror’ files, because these files can be recreated from the 'flac+mp3' compression option. Therefore if you run an ‘Export’ to a USB device, then format the B2's HDD and then ‘Import’ from the USB device, the ‘.mirror’ files will have to be recreated. So if you want to save the ‘mirror’ files you will need to make an arrangement to save the ‘mirror’ files; this can be achieved through a number of options including the following.
Related Functions
1. Mirror Files count.
To find out the number of mirror files present in the music collection, using the B2 remote control, press the ‘Info’ button twice and the front panel display will show ‘…… mirrored’.
2. Delete Mirror
From the front panel control knob; Settings > Maintenance > Delete Mirror
Delete Mirror |
Deletes all of the mp3 ‘mirror’ folders. Does not delete any primary level mp3 folders |
]]>
This is displayed on the scrolling status line of the OLED display as HDD Read Only.
You can still play music but you will not be able to load any music to the disk or make changes to playlists or settings for example.
Sometimes this condition is transient - typically caused by a power glitch. We occasionally see it in the lab if we fumble the power lead when we connect a B2.
This transient condition will go away if you turn the B2 off and on allowing a few seconds between.
HDD Read Only can also be caused by turning off the system while its writing to the disk. In this case the file system contains an inconsistency or corruption that will not go away when you turn off and on and you need to fix it.
This is a persistent HDD Read Only condition - but you may only see it from time to time - because it affects only one track or album or folder.
The best approach to fix a persistent HDD Read Only is to
Here are the steps in more detail
The disk corruption may prevent you from creating a backup - or it may only backup a part - thats why its important to backup regularly.
The disk corrupton could ultimately result from a physical defect or damage on the disk - in which case the problem is likely to recur after reformating - and you need to replace the hard disk.
If you cannot create a backup then all is not lost - we have succesfully used PC based disk recovery tools to recover music from otherwise unreadable B2 disks. You may be able to do it yourself (we use Wondershare Data Recovery) or find a local data recovery service.
If you need our help email us.
]]>
Select the Compression mode with Settings > Compression.